Setup for development with VS Code
To develop Dragonfly extensions, we recommend using Visual Studio Code as the environment of development. This section describes how to do the setup and debug your program.
Installing Dragonfly
Install Dragonfly as usual. The recommended installation path is C:\Program Files\Dragonfly2025.1.
Note
In this documentation page, the installation path will be identified as DRAGONFLY_INSTALLATION_PATH.
Before getting further, make sure the application is running properly, then exit the program.
Registering DLLs
Navigate to the directory where you installed Dragonfly. Right click on registerDLLs.bat and select Run as administrator.

Install Scoop and Required Packages
Scoop is a really nice command line utility that allows you to quickly install packages.
Open PowerShell like shown below:

Run the following command to install scoop:
Set-ExecutionPolicy RemoteSigned -Scope CurrentUser
irm get.scoop.sh | iex

Install required packages
scoop install git
scoop bucket add extras
scoop install vscode uv


Setup VS Code Environment
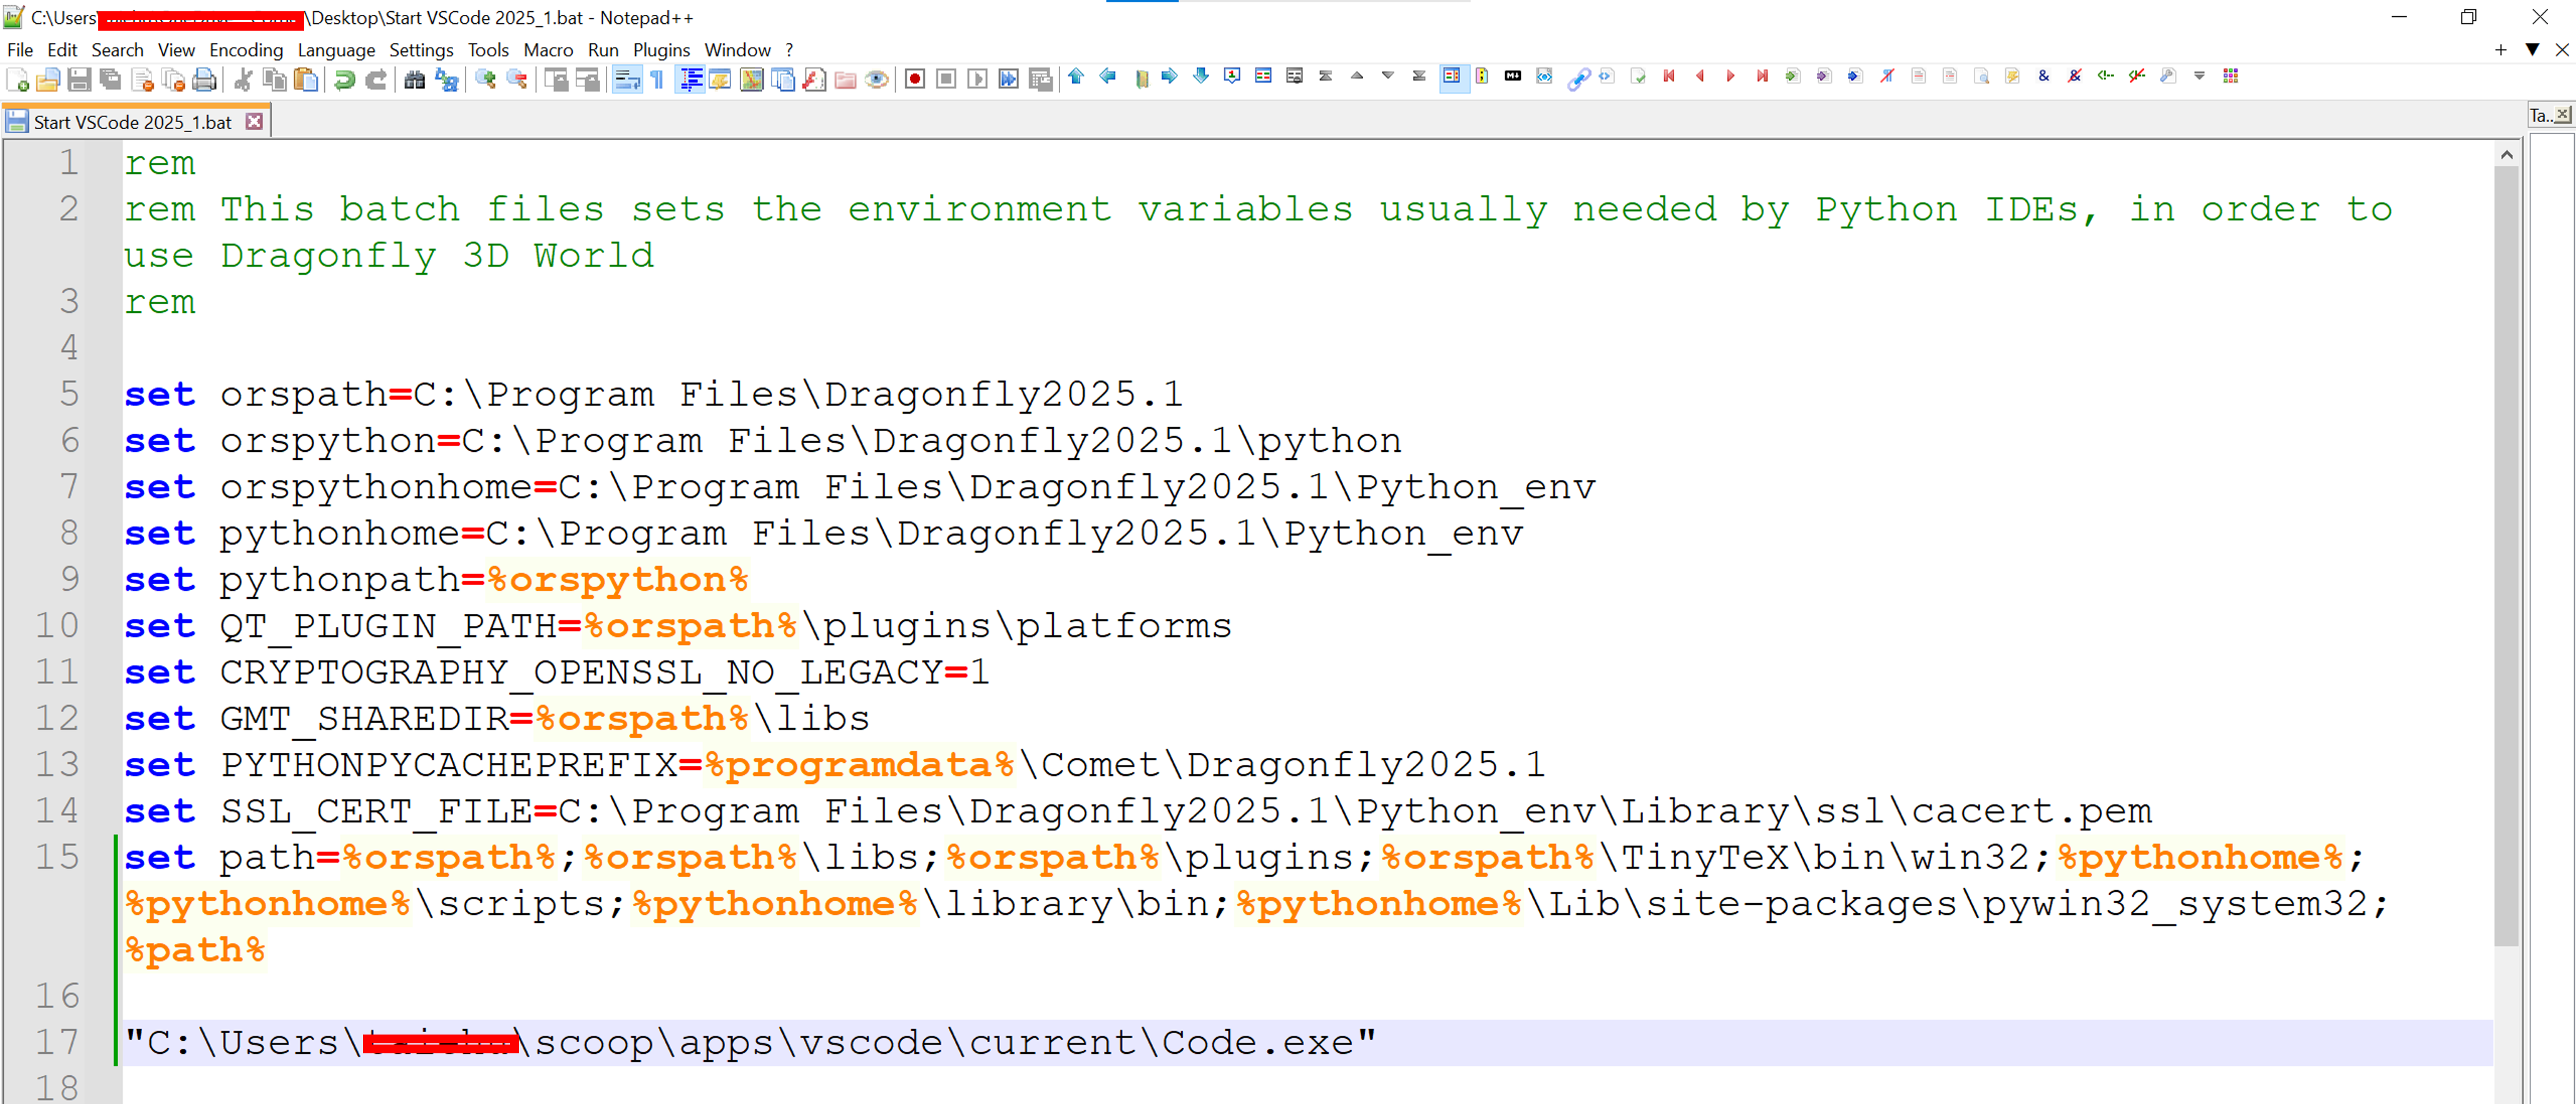
In a file browser, go to the folder DRAGONFLY_INSTALLATION_PATH. Copy the file setEVarsForPythonIDE.bat in a folder with writing permission (example, the Desktop). Edit that copied file with a text editor, like Notepad. Add the path to the VSCode executable at the end of the file. Save and close the file. Rename the file with a more relevant name, like Start VSCode.bat.
Generate VS Code Workspace from Dragonfly
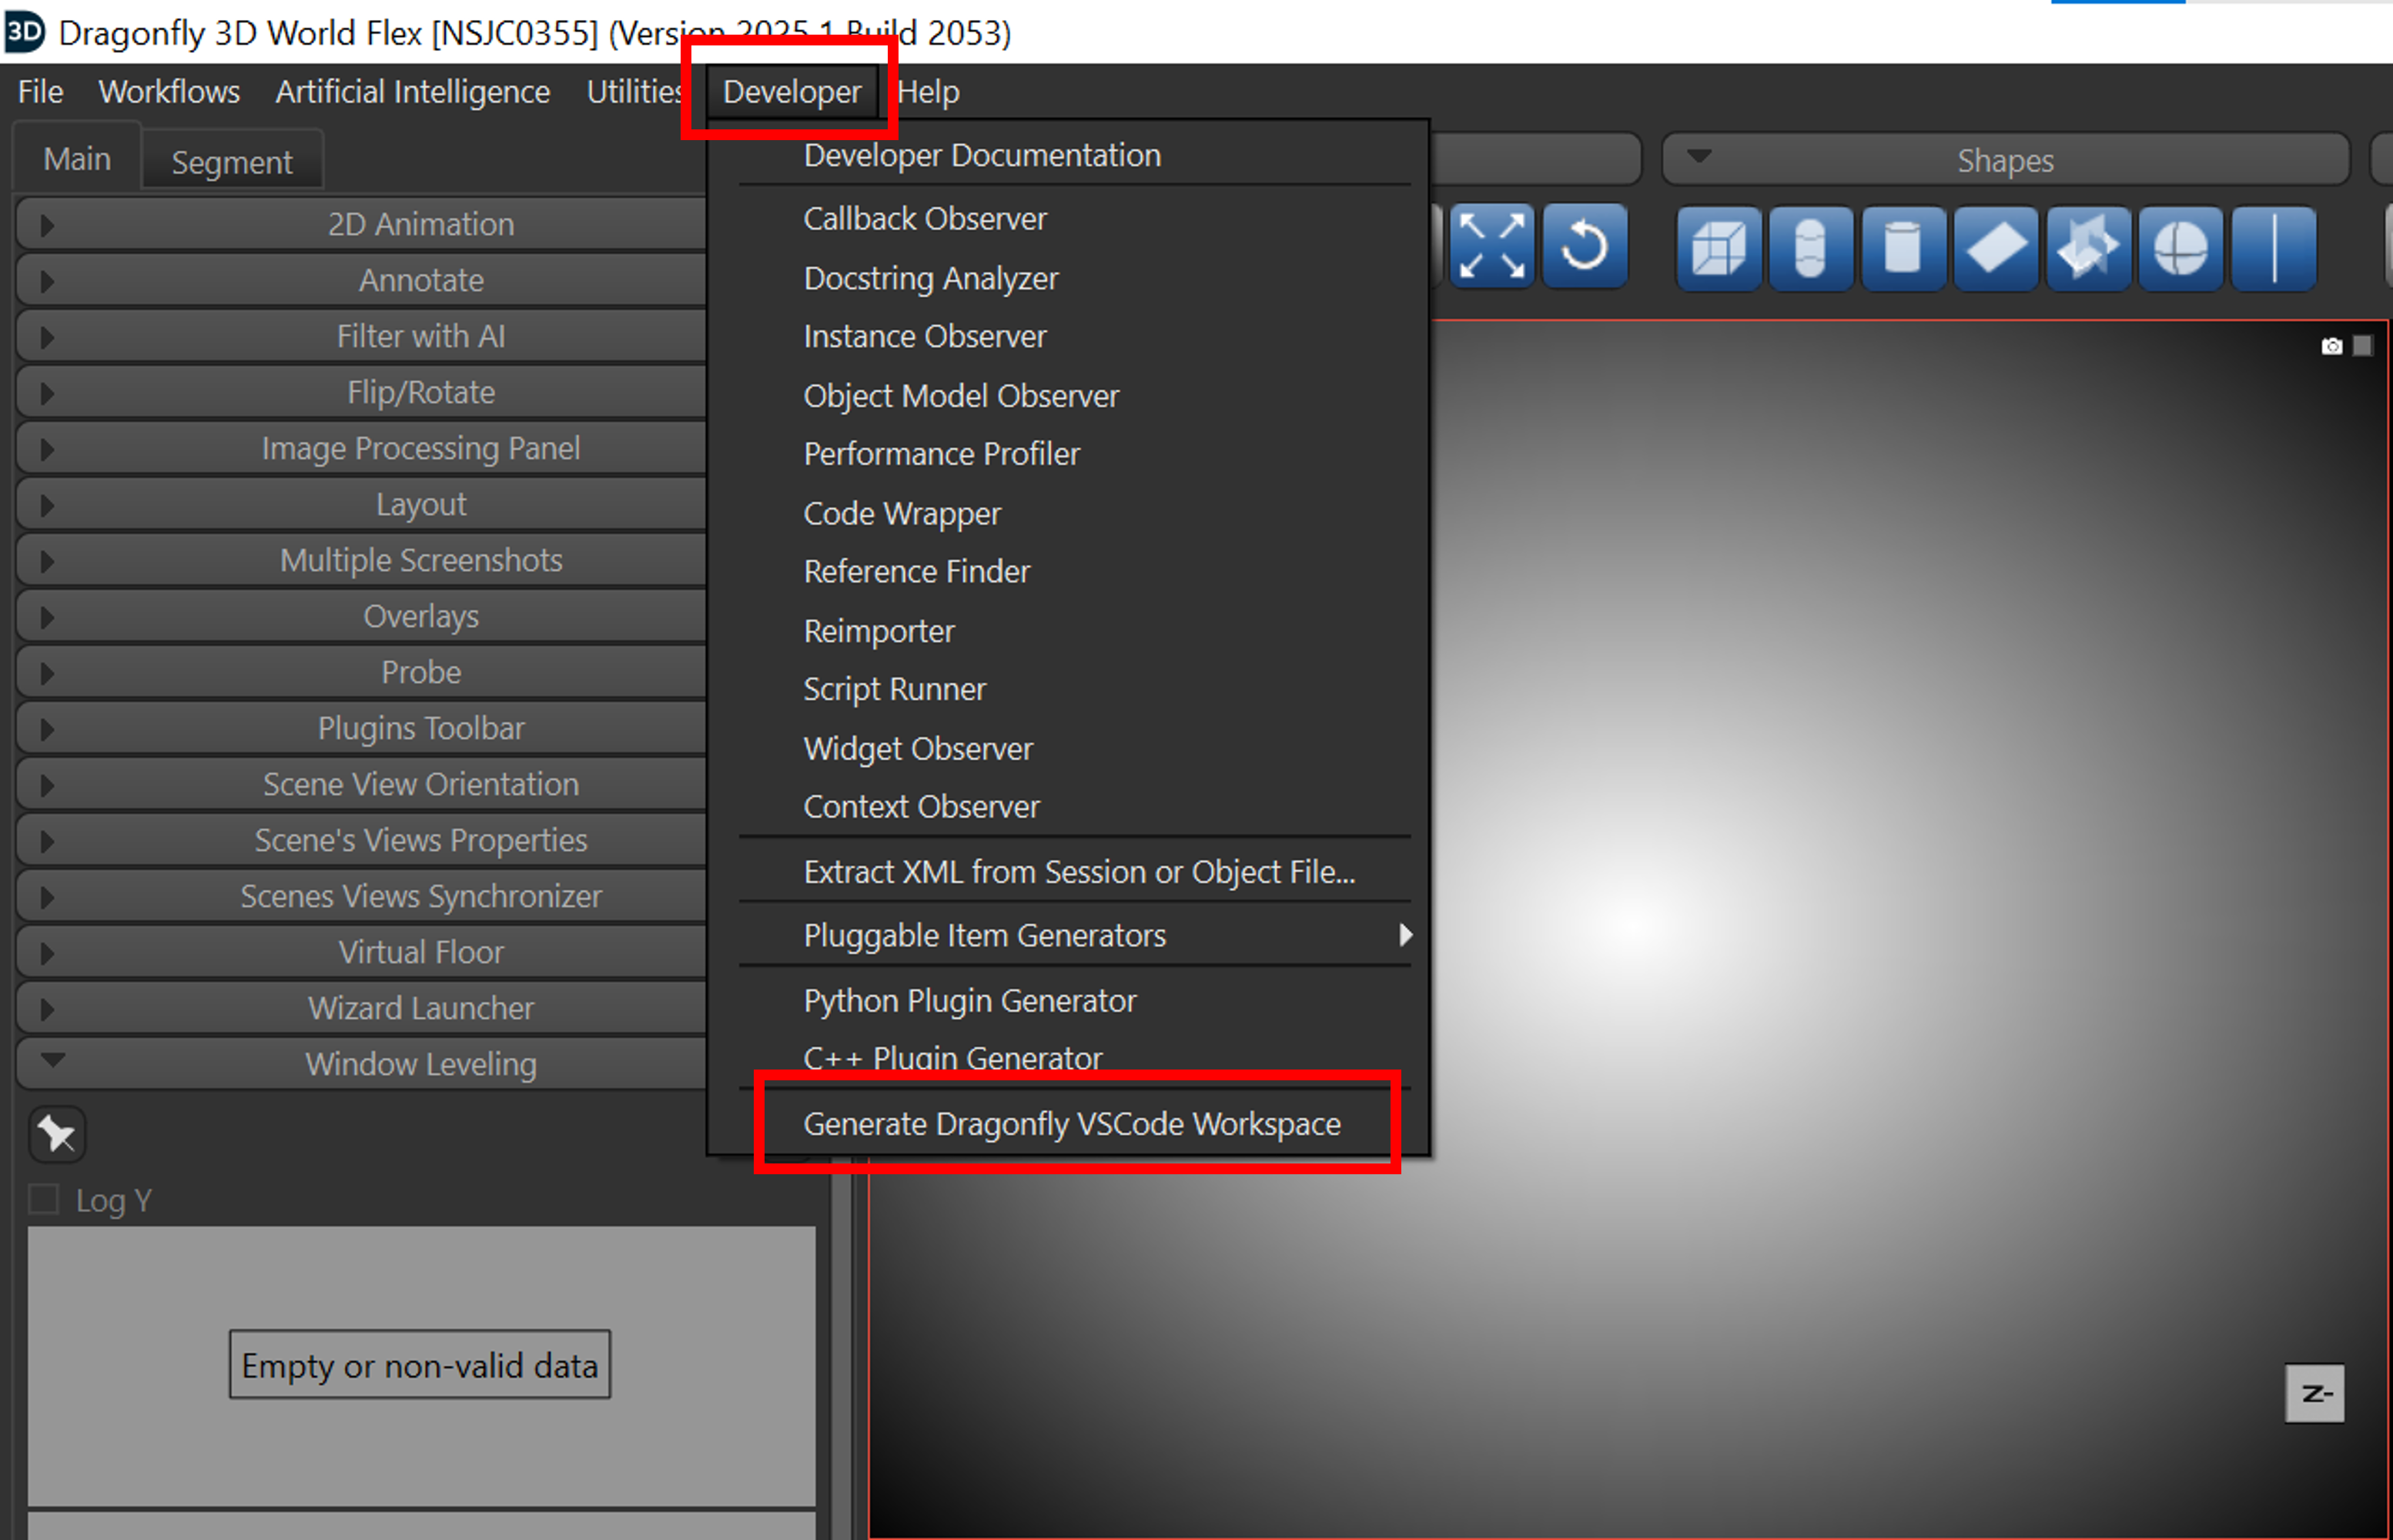
From within Dragonfly, go to the menu item Developer and choose Generate Dragonfly VSCode Workspace to generate a VS Code workspace file that contains all the necessary configuration.
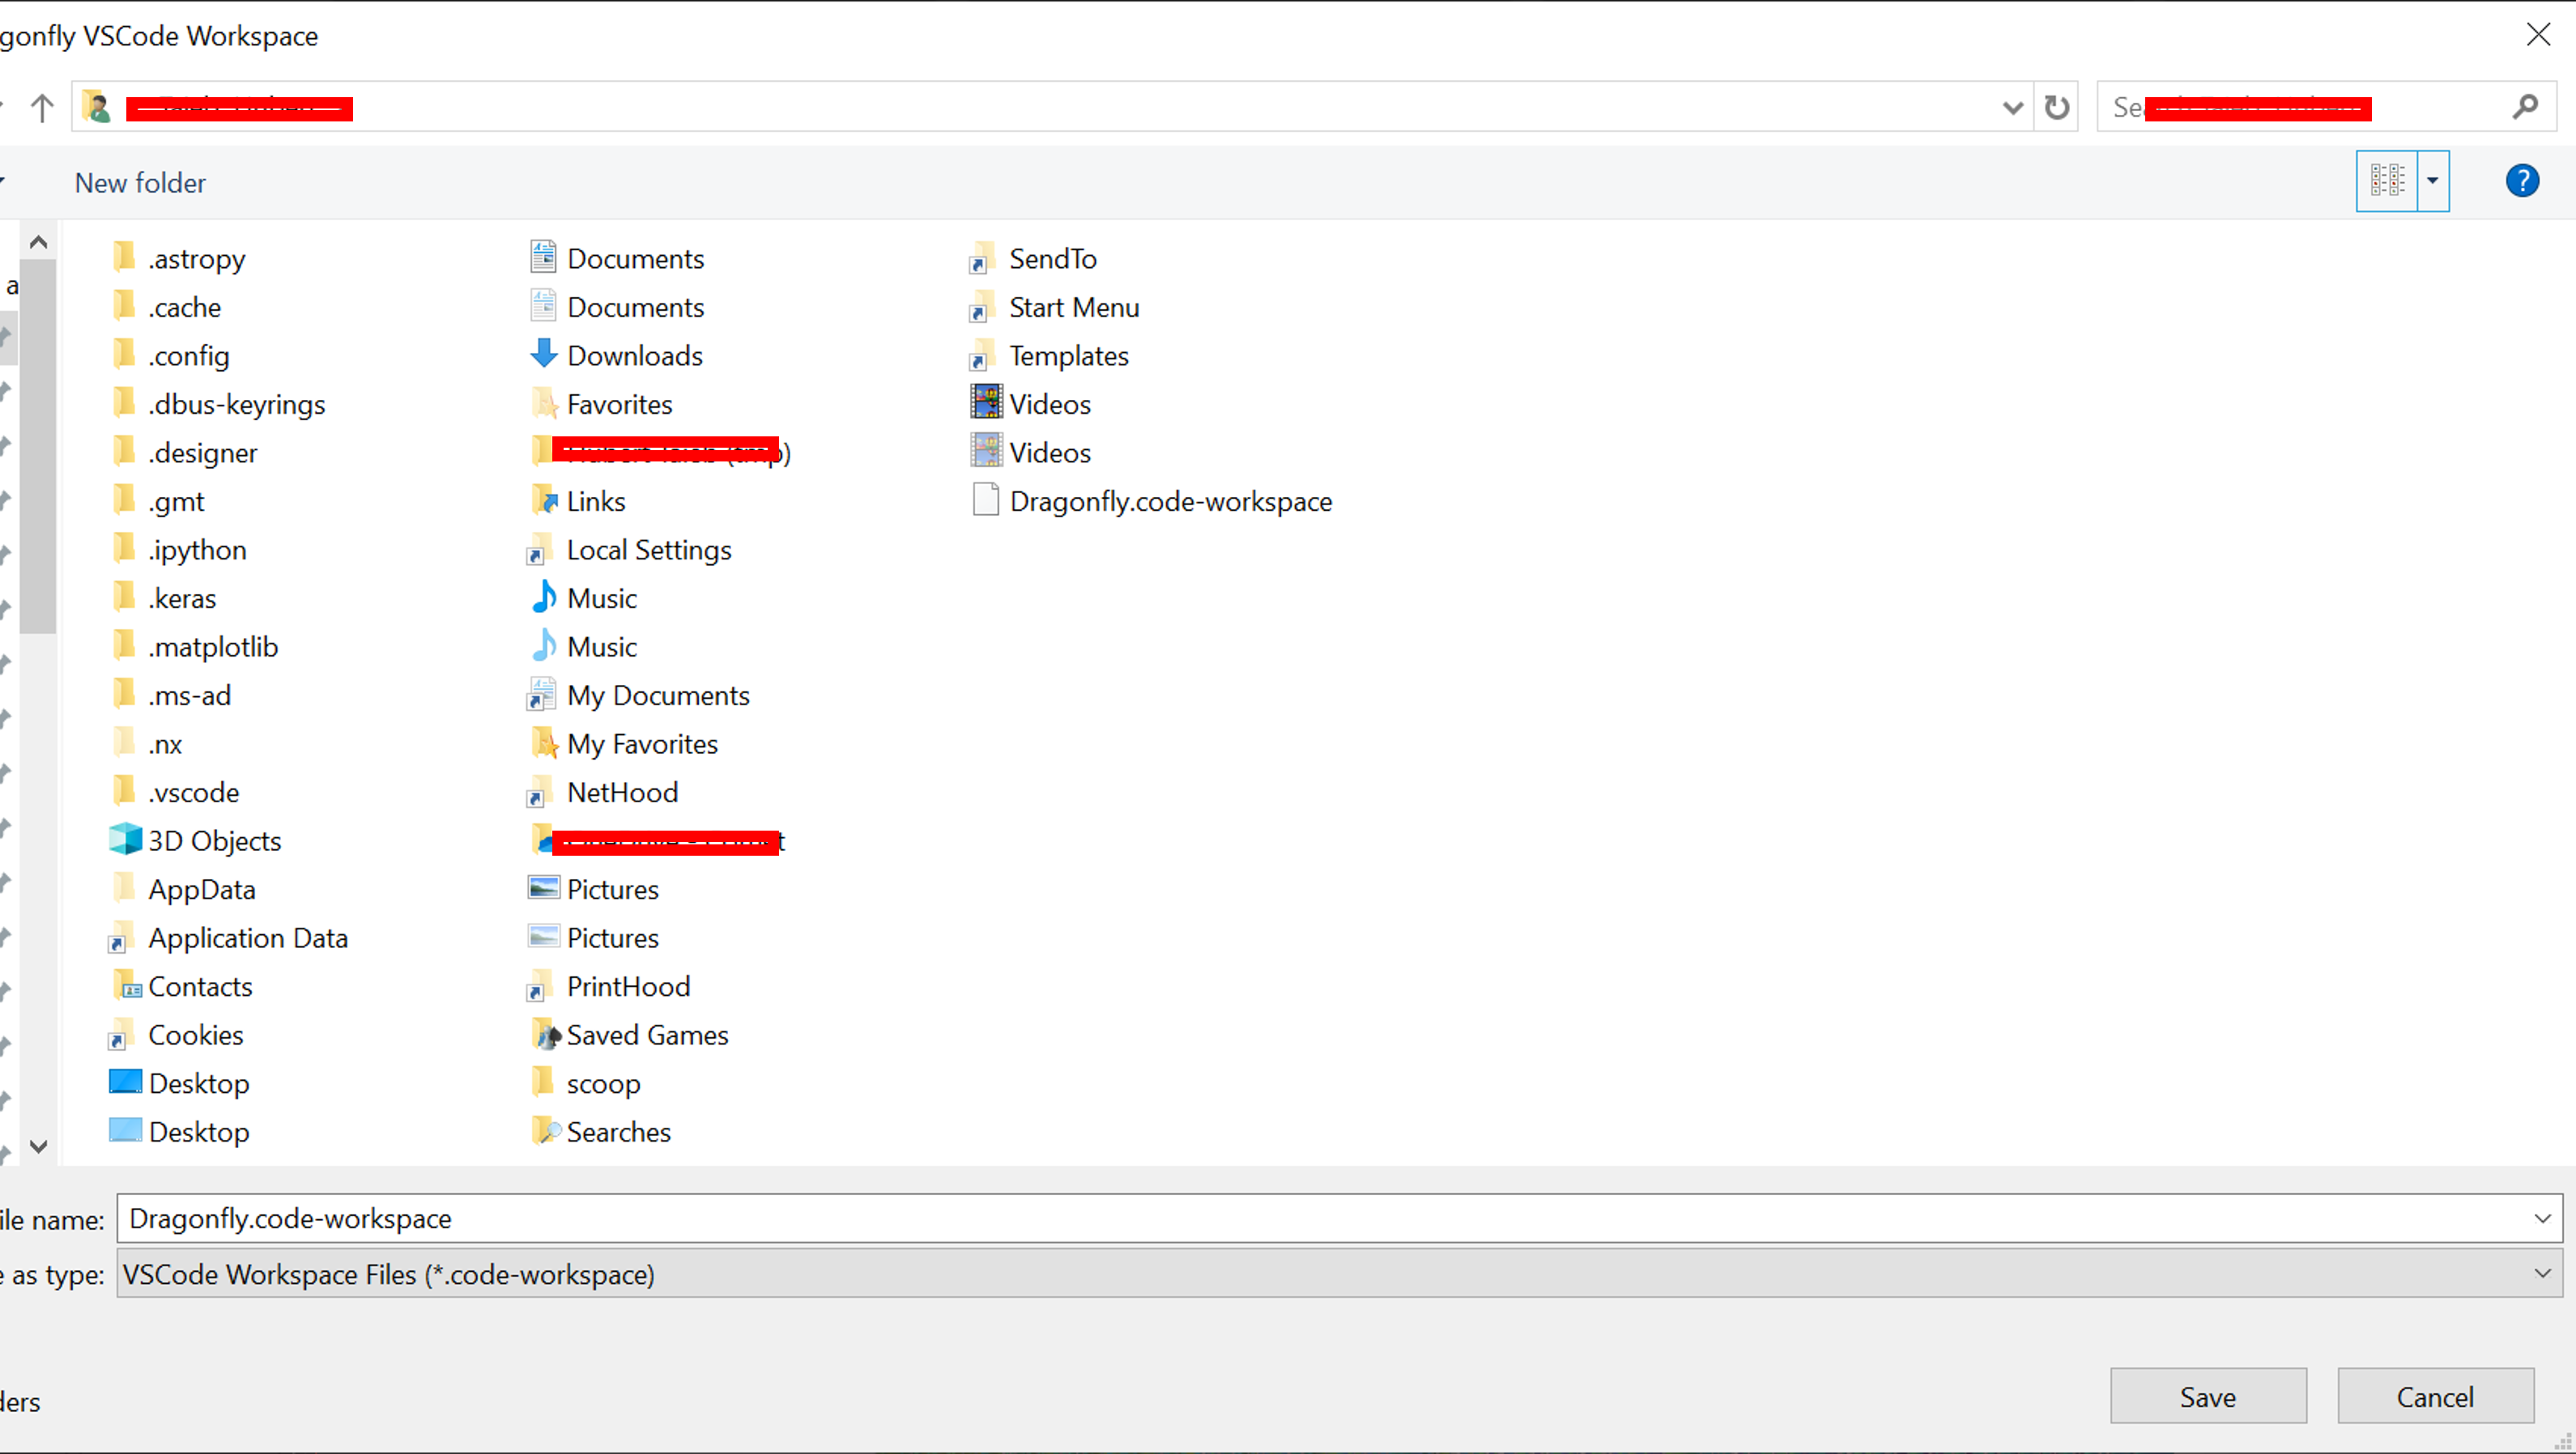
Save the workspace file in your user folder for easy access:
Opening VS Code from Dragonfly
Just after you created the workspace, you can open VS Code directly from within Dragonfly to ensure proper environment setup:
Warning
Always start VS Code through the Start VSCode.bat file as explained above. Not doing so will prevent Dragonfly from starting correctly from VS Code due to missing environment variables.

When VS Code opens, you need to trust the workspace authors:

Installing Recommended Extensions
We recommend installing 2 extensions to work with Dragonfly in developer Python Extension Pack and Roo Code. For that, you can go to the extension icon and install the 2 recommended extensions.

Running and Debugging Dragonfly
Once everything is set up, you can start Dragonfly in debug or run mode directly from VS Code by running the OrsMinimalStartupScript.py file:

Setting up Roo AI Assistant (Optional)
For enhanced development experience, you can set up the Roo AI assistant. First, get an API key from any provider you wish (We show here OpenRouter but any other will work):

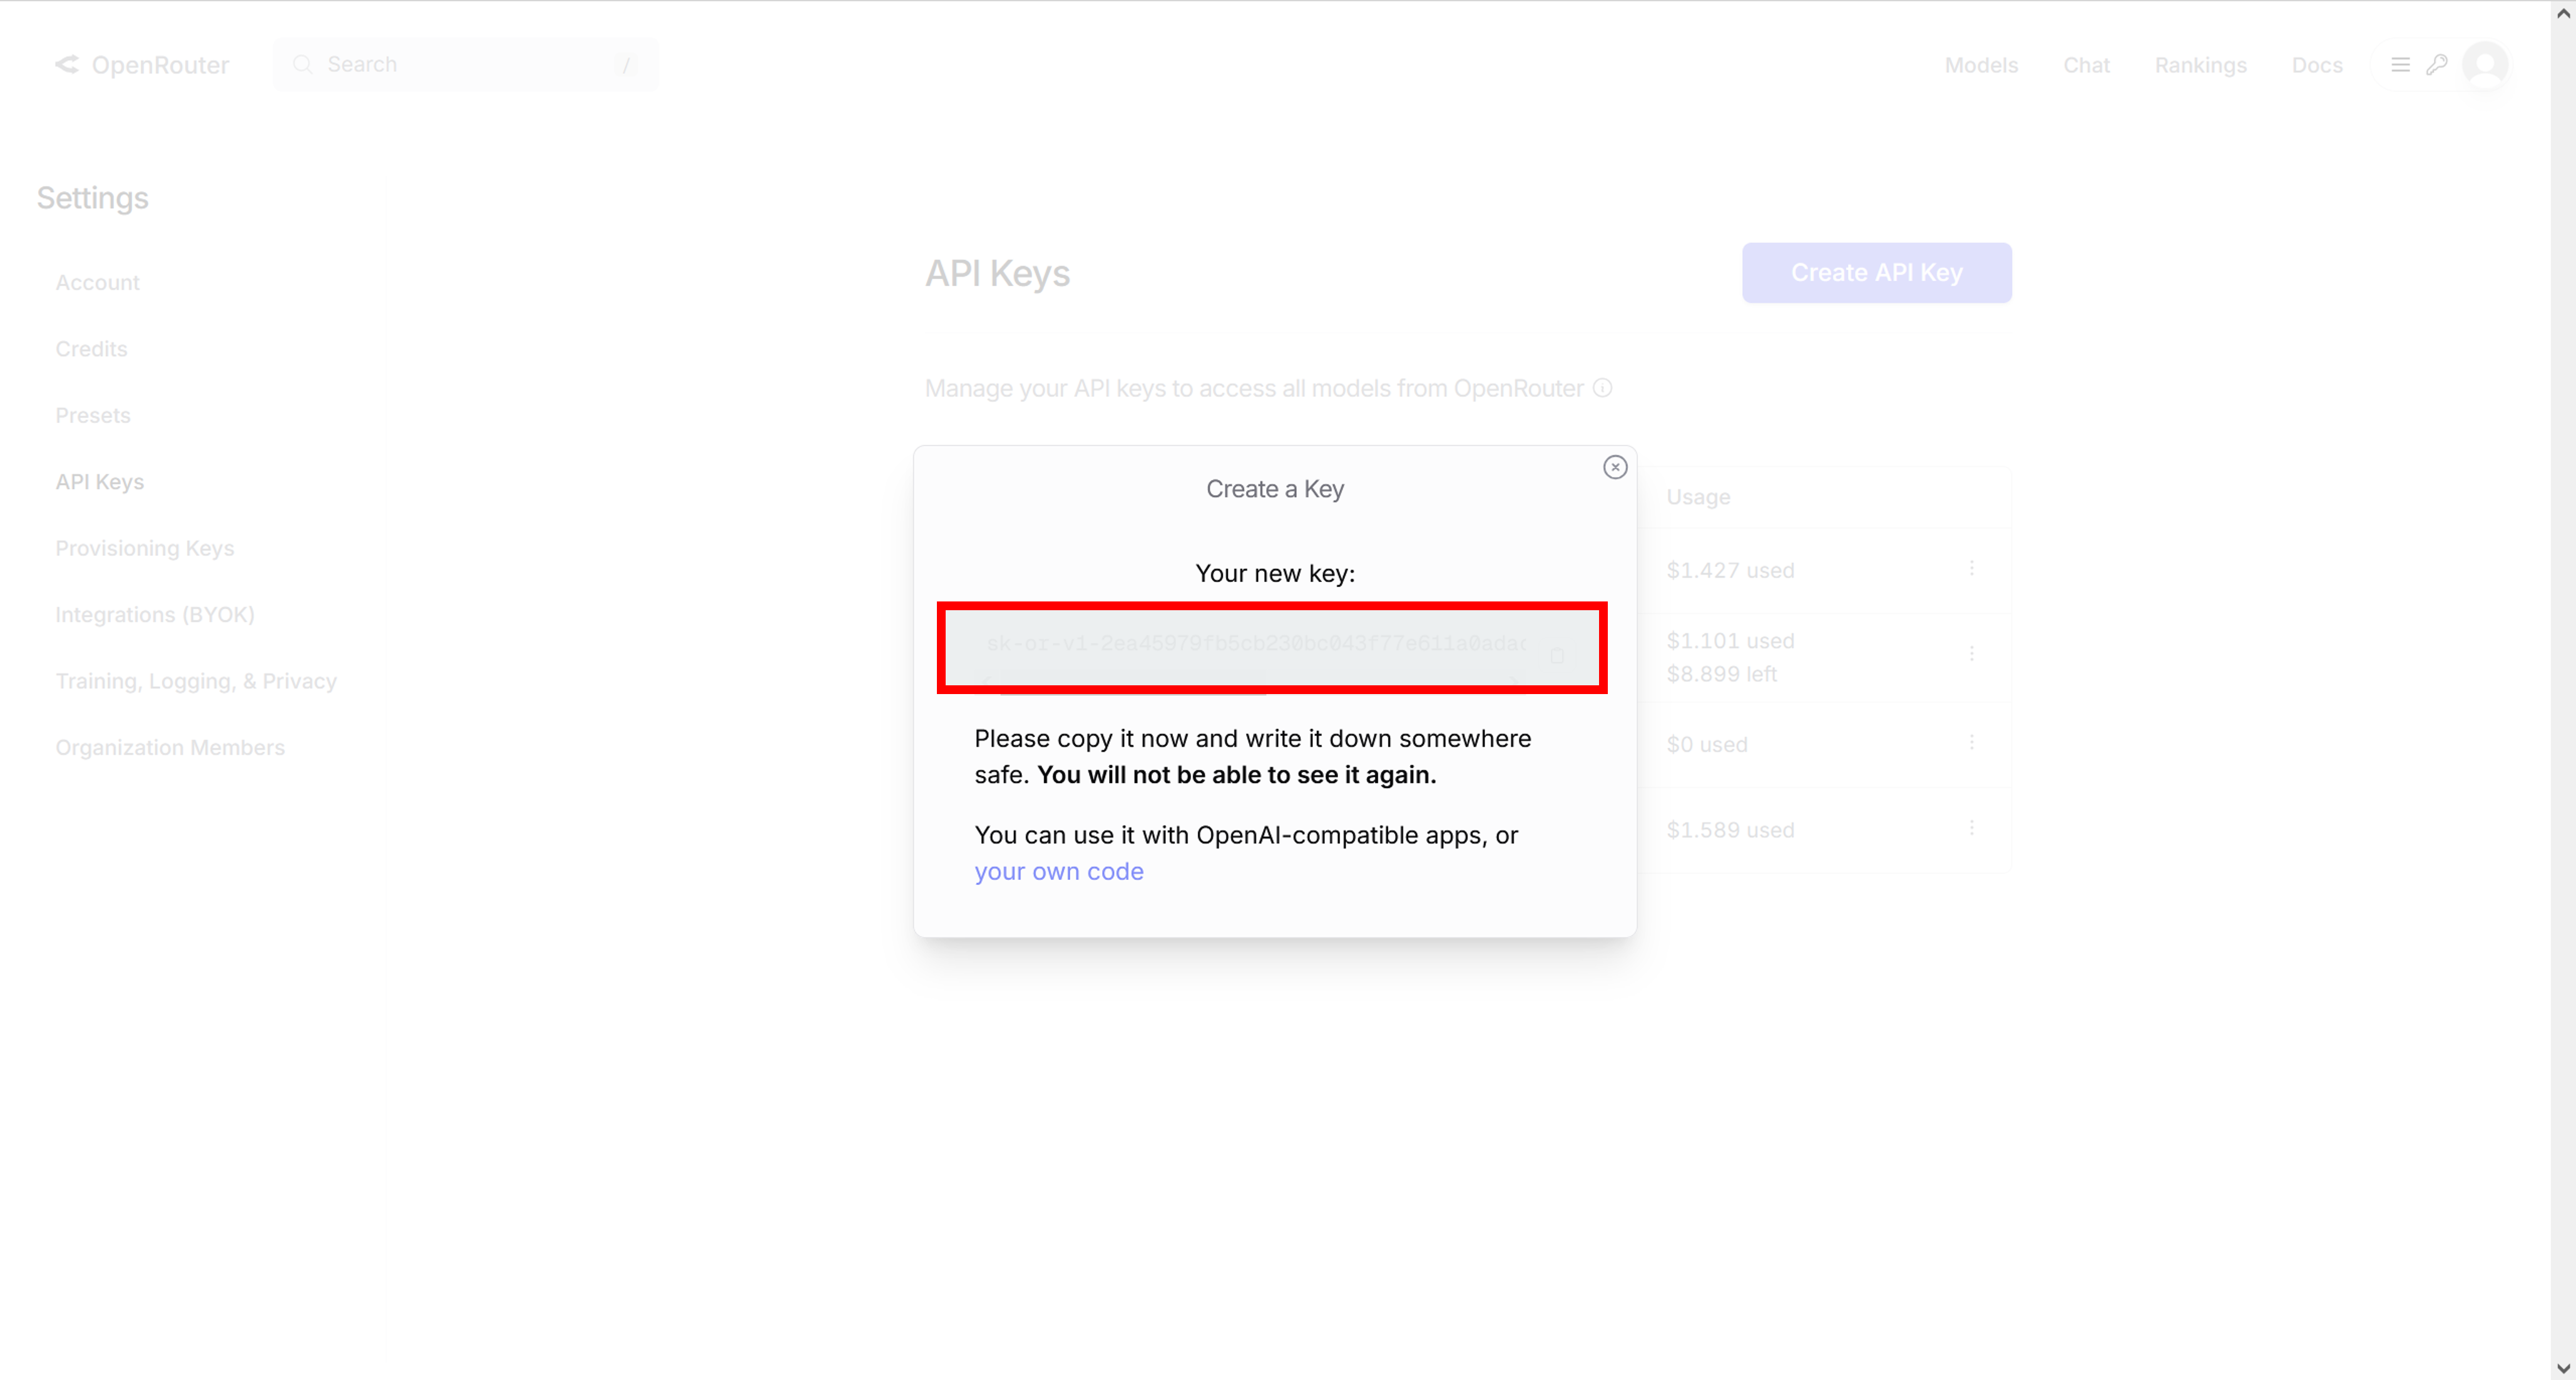
Go to OpenRouter and add credits to your account, then create an API Key:
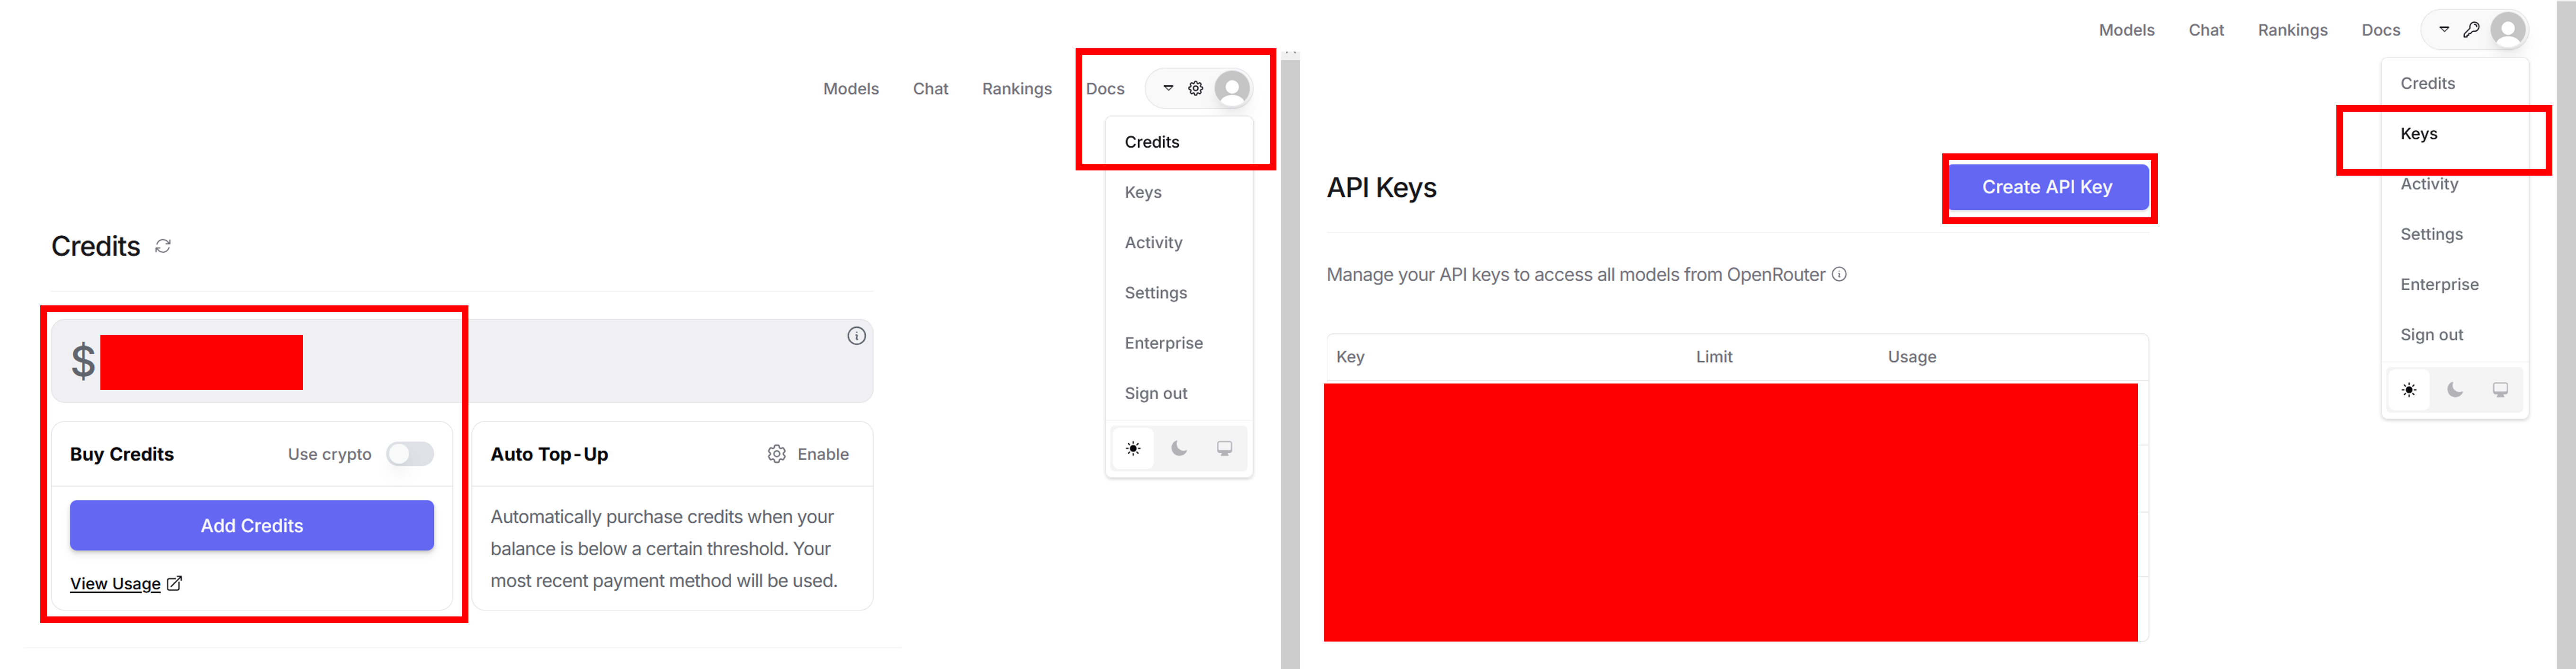
Copy the generated API key:
Insert the API key in Roo settings and verify the MCP Servers are running:

Configure additional Roo settings for optimal development experience:
Disable checkpoints, set Auto-Approve and set the reading files limit:

Debugging while running Dragonfly
When starting in Debug mode, you can set breakpoints on specific lines. While paused, you can use the debug console to examine and/or modify existing values. VS Code provides excellent debugging capabilities with variable inspection, call stack viewing, and interactive debugging.
Using the Python console in VS Code
VS Code provides integrated terminal support where you can run Python commands. You can also use the Python interactive window for testing code snippets. When properly configured, all Dragonfly modules are accessible even if the application is not started.
Note
If you encounter issues with graphics or OpenGL, you may need to specify the graphics card to use, similar to the PyCharm setup. This can be done by configuring the Start VSCode.bat to use a dedicated GPU or via your Nvidia control panel.